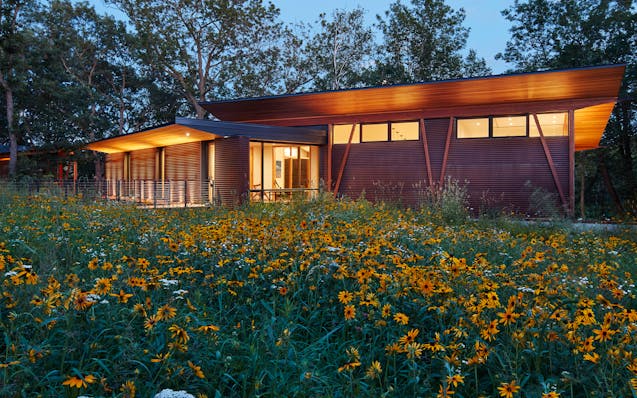
Home of the Month is a restorative Wisconsin retreat that also restores the land
A family's vision for wellness and healing starts with restoring native prairie and cabins tucked into the natural landscape in rural Wisconsin.
Home listings: What $275,000 buys you in the Twin Cities area
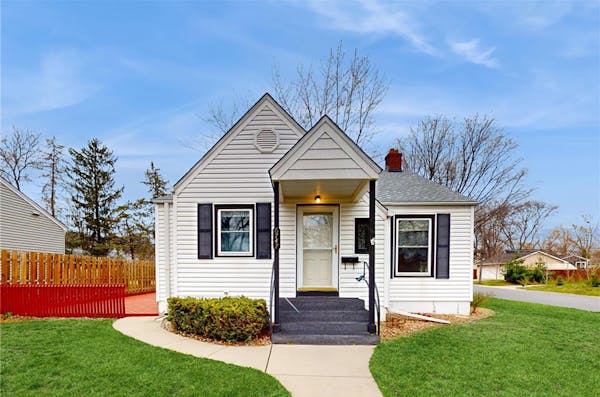
What you get for the money in Richfield, St. Paul and Lauderdale.
Don't Miss
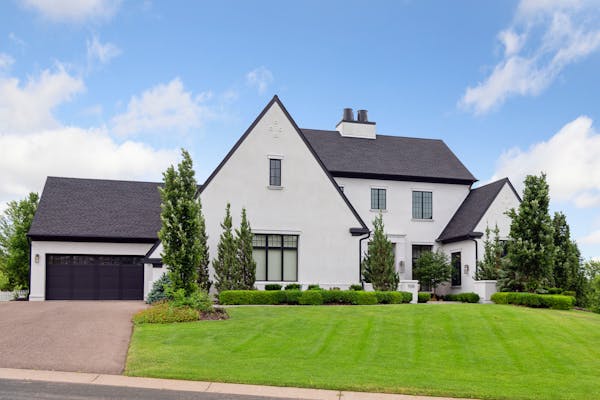
Gophers football coach P.J. Fleck lists 'resort-style' Edina home for $3.9 million
The award-winning house was built in a French European-meets-California modern style.
Home & Garden

12 award-winning home designs by Minnesota architects
The Home of the Month contest celebrates top home designs by Minnesota architects.
Variety

Two North Loop condos combined into one 'dreamy' space listed for $649,900
The now 1,700-square-foot Minneapolis condo has two kitchens, two entrances and three bedrooms.
Home & Garden

Four little books on nature and a show about an osprey family
Learn about spiders, butterflies, beetles and trees in four new books, and follow an osprey family in a TV show.
Home & Garden

Designer tips for adding interest to your walls
From wall stickers to murals, latest trends make all the difference in personalizing your home.
Home & Garden
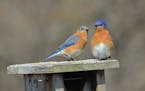
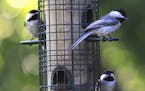
Take the group birding challenge: Find a Female Bird Day
How many female birds can you find in a day? Can you tell males from female birds? Some are easy, some are tricky, some are nearly impossible.
Home & Garden

2024 winning flowers for your garden and containers
These plants wowed judges at the All-American Selections awards.
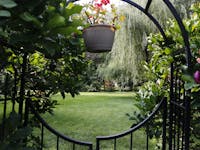
There are some spectacular private gardens around the Twin Cities. We discover several each year in our Beautiful Gardens contest. From October to April, we'll bring you into one Beautiful Garden a month.
Music

Coming soon to Airbnb: Prince's once-derelict Purple Rain House in Minneapolis
"Sleep like the Kid himself," reads the property listing, which names bandmates Wendy and Lisa as the hosts.
Home & Garden

Plant sales: A perennial favorite for great bargains and great gardening advice
From local gardening groups to school fundraising clubs, organizers are gearing up to bring a stockpile of plants to a community near you.
Home & Garden

Minneapolis couple double down on Uptown with renovation of beloved condo
A couple maximized the floor plan and incorporated finishes that better express their style in their condo on the Midtown Greenway.
Home & Garden
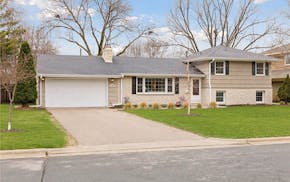
Home listings: What $565,000 buys you in the Twin Cities area
What you get for the money in Edina, Minneapolis and Cottage Grove.
Home & Garden

Fewer loon chicks surviving due to climate change, researchers say
Increased rainfall is decreasing water clarity, making it harder to find food for chicks.
Home & Garden
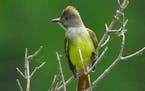
New book helps you know your flycatchers
Three of Minnesota's common flycatchers are in the field guide.
Variety

Event will celebrate 20 years of Home of the Month contest and offer peek at top residential projects
An upcoming event will offer a peek inside top residential designs and a chance to ask architects and homeowners questions.
Variety

Elegant condo in former Minnetonka office building could be yours for $379,900
Updated condo has two bedrooms, two bathrooms and 6-foot-tall windows with views.
Variety

Over 27 years, couple have renovated Hopkins 'three-chimney house' built by Gluek family in 1939
Colonial that once belonged to famed Minnesota brewing family has been updated but retains its old New England aesthetic.
Home & Garden

Home listings: What $455,000 buys you in the Twin Cities area
What you get for the money in Shakopee, Farmington and Oak Park Heights.
Home & Garden

St. Cloud house vies for Ugliest House in America
The Minnesota house will be featured in Season 5 of the HGTV series, which debuts on Monday.
Home & Garden
Home & Garden

Six changes to make your backyard greener life while reducing your carbon footprint
Plant a tree. Or four. And ornamental grasses can absorb three times as much CO2 as a typical lawn.
Business
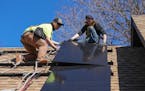
How to solar power your home to lower your carbon footprint
There are more options for boosting solar power at home than you might think, including installing rooftop solar, subscribing to a community garden or simply paying extra to your utility.
Browse Variety Sections
Around the Region
- Deforestation in Indonesia spiked last year, but resources analyst sees better overall trend
- African farmers look to the past and the future to address climate change
- Australians Grace Kim and Hannah Green tied for lead in LPGA Tour's JM Eagle LA Championship
- Angry farmers in a once-lush Mexican state target avocado orchards that suck up too much water
- AP PHOTOS: In northeastern Argentina, yerba mate is more than the national drink, it's a way of life
- US advances review of Nevada lithium mine amid concerns over endangered wildflower
- 8 ways to personalize your rental — and get your deposit back
- California tribe that lost 90% of land during Gold Rush to get site to serve as gateway to redwoods
- Agribusiness giant Cargill not doing enough to fight deforestation, protect human rights, group says
- Weather vanes: Exhibit looks at artworks with a purpose
Most Read
- Gophers football coach P.J. Fleck lists 'resort-style' Edina home for $3.9 million
- Renting and the law: Noisy, noctural neighbor makes it hard to sleep
- Home of the Month is a restorative Wisconsin retreat that also restores the land
- Hummingbird feeders don't have to be red
- Lead water lines: a home inspector's perspective
Home and Garden
Coverage of the latest trends in beautiful Minnesota gardens and home decor.
