Thanks to recent advancements in digital camera technology, photographing the night sky has become possible for almost anyone owning a digital camera with manual settings. And lucky for us here in Minnesota, winter is the best time to experiment with capturing the beauty above. Not only does winter provide stargazers with more viewing hours, but the atmosphere is clearer when it's colder, with less particulates to block the stars.
First off, here are the basic ingredients for a successful night of skyward shooting:
Warm clothing
As a staff photographer, I've learned to dress for the cold with lots of warm layers. Dressing in layers has often allowed me to shoot comfortably for hours, even in subzero temperatures. Warm boots are a must. I prefer lightweight gloves so I can work the camera controls, but I always keep hand warmers in a muff or pockets.
Tripod
Photographing the night sky often requires exposures of 10 to 30 seconds, making it all the more essential to be on a solid base.
Camera
The ideal camera is a digital SLR with interchangeable lenses, plus manual controls for shutter speed and ISO (to adjust your light sensitivity). Most point-and-shoot digital cameras don't have fast enough lenses for astrophotography.
Lens
I prefer 24 mm, or even wider, to capture the full scope of the sky above. The faster the lens the better — f2.8 is a minimum, but f1.8 or f1.4 is even better. I shoot wide open, with focus set at infinity.
Trigger
A remote trigger will prevent you from bumping your camera during exposure. If you're interested in time-lapse photography, consider an intervalometer that will allow you to take multiple exposures over time. Intervalometers are available for about $30 apiece on eBay or Amazon.com.
Location
The darker the better. Much of Minnesota is far enough from city lights for a successful shoot. I prefer a wide open space, located at least 10 to 20 miles from the nearest town, with clear views of the northern horizon (because you might get lucky with those northern lights).
Flashlight
A small flashlight or headlamp will come in handy for seeing your camera controls. It's also possible to do some light painting on trees or foreground objects during your exposure.
Getting a great shot
Once you find a dark location with an unobstructed view of the night sky, get started by framing your shot for the best composition. I often use trees or a small building in the foreground to add interest and scale to the shot.
Once you are happy with the composition, take a few test shots. I start with an ISO setting of 1600, aperture of 2.0 or 2.8, and a shutter speed of 15 seconds. Take a look at your images on your LCD to see how it looks, but keep in mind that your images will look much lighter on your LCD in the dark than they will on your computer back home. If your image is too dark, try opening up your aperture — 1.8 or 1.4 would be ideal. But if 2.8 is all you have, try increasing your ISO to 3200 or even 6400 if you have a newer DSLR camera. Another remedy for dark images is to double your shutter speed to 30 seconds, but that's the limit. Any longer will create star trails.
Once I have an exposure of the sky I'm happy with, I often do a little light painting with a flashlight during the exposure to highlight foreground trees or buildings. Also be careful not to have bright lights on inside any buildings you're photographing — say, a cabin. If you want the windows to glow, often a small candle will be enough to light the inside without being too bright.
My final advice is to shoot RAW files rather than JPEGs. RAW is an untouched file format, with no compression or correction, giving you much more flexibility with exposure and post-processing once you're back at the computer.

Twins reliever Stewart builds on impressive 2023 season
Kucherov is 5th player in NHL to reach 100 assists as Lighting beat Matthews, Maple Leafs 6-4
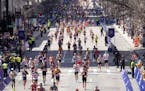
Grateful for the beast that is the Boston Marathon

Joel Embiid scores 23 points, has the big assist as 76ers beat Heat in play-in to earn No. 7 seed